Summer is just around the next turn in the road, and I still haven't followed through on my New Year's resolution -- teaching my cats to change the oil on a 2006 Toyota Tundra. In the meantime, I thought I'd spend some time servicing the transmission fluid and filter on my 1996 Jeep Cherokee 4x4 Country. Earlier this year, Michael, my um-friend, said he had recently performed the same service on his 1992 Dodge 350 Wagon, and that he'd be willing to document my time under the hood.
"Okay," he said, "just as long as you're not just changing the oil. I mean, heck, your cats could probably change the oil." So, with the collaboration of such a wonderful um-friend, it was time for me to get down in funky town.
My car, a 1996 Jeep Cherokee 4x4 Country, was due for servicing, after 2 years (since January 2005) of road trips:
| Arizona |
Aguila, AZ Brenda, AZ Montezuma's Castle, AZ Phoenix, AZ Prescott, AZ Sedona, AZ Skull Valley, AZ The Granite Dells, AZ |
| California |
Ancient Bristlecone Pine Forest, CA Balboa Park, CA Bear Mountain Ski Area, CA Benton Crag, CA Big Rock, CA Bishop, CA Bodie, CA Cabrillo Munoment, CA Clairemont Mesa, CA Holcomb Valley, CA Humber Park, CA Idyllwild, CA Indian Cove, CA Joshua Tree National Park, CA Julian, CA June Lake, CA Lassen, Shasta, Napa, CA Lee Vining, CA Mammoth, CA Mission Gorge, CA Mono Lake, CA Morro Beach, CA Mount Laguna, CA Navarro Beach, CA Palm Springs, CA Rock Creek, CA San Francisco, CA Santee, CA Silver Canyon, CA Stonewall Peak, CA Suicide Rocks, CA Tahquitz Rock, CA White Mountain, CA Yosemite National Park, CA Yucca Valley, CA |
| Nevada |
Las Vegas, NV Red Rocks, NV |
Anyway, this journal may prove to be of some use for those of you who would like to try and service the transmission fluid and filter on your 1996 Jeep Cherokee 4x4 Country, and it is also a convenient place for me to post more content about me, what I do, and generally what makes it so great to be me.
I won't pass the buck, and link you to some other website's instructions. You came here for the down low, and you're gonna get served.
Materials
|
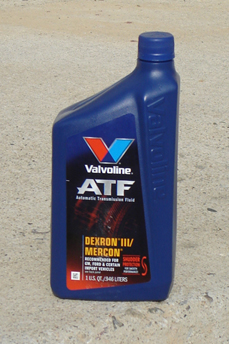
5 quarts automatic transmission fluid. Just go to your local shop and ask for what's recommended. This particular 1996 Jeep Cherokee 4x4 Country actually has a Toyota transmission, so it uses different fluid than other Jeep trannies. I don't know why the Toyota boys were slapping trannines on our Jeeps. You'd think somebody at the factory would have noticed and put a stop to that nonesense. Anywho, your local shop will either sell you the right stuff, or they'll just send you out the door with whatever crap they're trying to unload. Either way you got 5 quarts, and what do you know anyway? The guy I bought the stuff from looked me straight in the eye and told me that this is the stuff that I needed, so I bought it. Besides, People won't lie to you just to sell you something, right? I mean, his shirt had his name on it. My shirt didn't have my name on it. Who are you gonna trust? Exactly. He said that both NAPA and FRAM are crap. He said that everything is crap. He started screaming. His spit was landing on my gasket and filter kit. His pens fell out of his shirt pocket. After he passed out, another cashier took my money, and I drove home. |
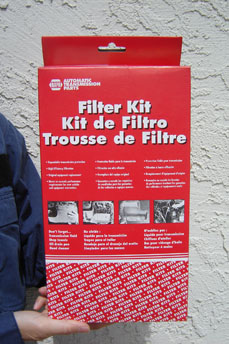
Transmission gasket and filter kit. Same gig. Just ask the local parts shop folk. Again, give them the pertinent data:
*I don't know of it really matters to tell them about the spooge on the carpet, but I feel a lot better when being straightforward and honest. |
 |
 |
Tools
Use high-quality lifetime-guaranteed tools. This is the best advice I have ever recieved in my entire life. Your tools will pay for themselves probably in their first use, so it's never really a matter of money. Cheap tools will strip your bolts, and break in your hands, and you will ever carry the embarassment of cursing in front of your neighbors and their children. So buy quality tools. Okay. Done.
9/16 box wrench for the transmission pan drain plug |
1/4-drive 10mm socket with universal elbow for the transmission pan screws |
Carbeurator cleaner for cleaning the interior of the pan, dipstick connection, magnets, and bolts |
Engine degreaser for cleaning the exterior of the pan and nearby chassis and drivetrain |
Razor-blade scraper-dealy for cleaning the gasket mating surfaces |
Transmission filler tube funnel |
2 medium-sized house cats for wiping up spills |
Cigarettes for blowing yourself to pieces around all of these combustables |
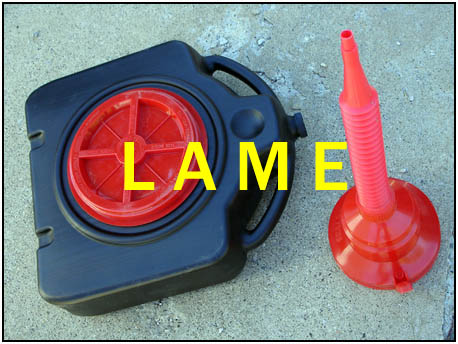
Cat-litter box for collecting the fluid* *Don't get a weenie "sealing model". Their lids are not secure, and they don't hold enough fluid for a *real* vehicle. If you drive a toy golf cart, Toyota Tundra, etc., it may be fine for you. Instead, use an open cat-litter-type container which covers a wide area, so that when the pan is lowered, it can collect all of the drippings -- not just fluid from a single drain plug. Then pour the fluid from the cat-litter-type container into a 2- or 5-gallon paint bucket with a *real* lid that actually seals. That way, you only go to the oil collection station once every 2 years, instead of everytime you collect a little oil. Later, you can use the cat-litter-type container as a general tool cleaning and nasty-oily-things storage tub. Maybe even clean it real good and let your cats use it. Who knows. |
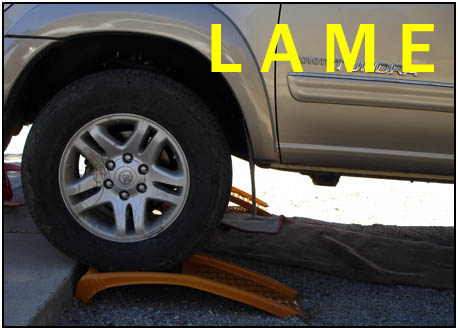
Wheel ramps Come on. Man-up, Nancy. Unless you're driving an over-cammed streetracer with an airfoil bolted to the trunk, you don't really need these. Besides, the higher you lift your vehicle, the more meat it will crunch when it comes down. And, it will come down. Believe me. Just leave your vehicle on the ground, and grunt a little more, and we'll both be better off. Look at this example below -- here some schmuck is using wheel ramps, when he could just as easily used the end of his driveway. Look! The driveway height matches the wheelramps. Come on here, people. This is not a time to accessorize. |
 |
 |
Michael, of course, knows how to do this already. The Jedi taught him well. His support and guidance through this servicing has renewed my faith in mankind. He rocks. He is the man. :-)

Draining the used transmission fluid
Be calm.
Warm the fluid. Drive around. Go shopping. After about 10 minutes of driving, your fluid will be good and hot. Park the car on a solid, flat surface, away from any hookers or college students. Be careful working under the car when it's hot. Don't touch anything that you aren't sure of beforehand. And, don't put your hair near anything that will tear your scalp off or set it on fire. Again, watch out for any hookers or college students.
Maybe you can pay your neighbor's kid like 5-10 cents and hour to be an official questionable-area-of-the-car-"toucher", that way the kid will let you know what is too hot or dangerous to touch and you can stay clean and unscathed through this whole ordeal. Kids are cheap, and there are a lot of them. Get out your change-purse, it's time to prime the economy.
Good prep == no cleanup.
I like to set up some cardboard with some old rags under the vehicle so my Gestapo neighbors don't get all up in mine. I live in an area where the median house is priced around 900K-1.5M, so people totally freak when they see me working on the car. They're all, "Huh? What?!? Isn't there, like, some place where you just, like, pay people to do that for you?"
Anyway, set up something to collect any spills or splashing, then position the collector bin under the drain plug and lossen the plug. Righty-tighty, lefty-loosey. You want loosey for this one.
Go and do something for an hour. Surf the net. Read some email. Whatever. An hour.
Now the car should be much cooler, and safer to work under. Still, be on the lookout for any hookers or college students. After it drains to a very slow dribble, replace the plug (finger-tight is good for now) and empty the collector bin fluid into the sealable 5-gallon paint bucket (and put the lid on smart-like).
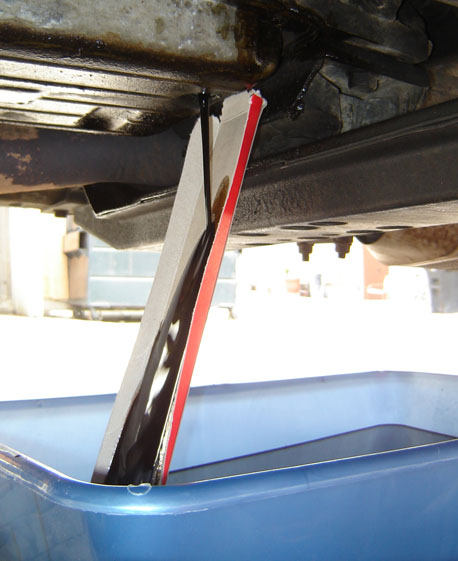
Note the cardboard funnel cut from the gasket & filter kit box.
Also, the fluid is running into the cat-litter-box collection bin.
Removing the transmission fluid pan
Be calm.
Now, grab you 10mm wrench (thank Toyota for the metric mixing), and remove the 19 or so pan screws/bolts. I think I had 19. Anyway, you should count yours before hand, and make sure you have one screw for every perimeter pan hole. It really sucks to put things back together only to find you have an extra bolt lying about. It's best to remove bolts in some kind of crosswise clockwise motion. It's supposed to not stress the flange, or something. Check a manual, or ask a mechanic -- anyway, do something. I use The Force, but not everybody is able to.
Be calm.
You'll soon see wht you need a cat-box-bin type of receptacle, instead of one of those weenie "sealing models." When the pan comes loose, it will leak about it's perimeter, and you need a bin or pan long and wide that will catch the spillage.
Now, be sure that all of the pan screws are out.
Here'e the part that wasn't in the manual. Even the guys at the shop didn't have any advice on this. Apparently, the dipstick filler tube connects directly to the pan. Well, to remove the pan, you need to be sure that the dipstick filler tube comes apart at a mechanical fitting about 2 hands up from the bottom of the pan. If you look up and around from the pan toward the passenger side, you will see and feel a tube exiting the pan and heading up and off. Pop the hood, and pull the transmission dipstick. Place it down somewhere. It is a scientific fact that it takes less energy to place something down than it does to levitate it. Science doesn't lie, so place it down somewhere.
Be calm.
After that, go under the car and prepare for the utmost in automotive pleasure. Set your self under the pan and try and jostle it free. Be careful not to pry it with, oh, say, a claw-hammer or perhaps a screw-driver or even a cold-chisel. Those are all bad choices. They will all probably mar or dent the gasket seat on both the pan and the block, and then you will be screwed. So, just put some elbow grease into it and get it loose. Sometimes, a rubber mallet is great for jarring something loose in situations like this. Why isn't it on the list? Because I didn't use one. Make your own list, mallet-boy. Whatever you do, don't gauge the gasket mating surfaces, nor warp the pan. After the pan is loose, it will still dangle (yes, I said dangle) from the dipstick filler tube. This is where the utmost in automotive pleasure part comes in. You will now have to work the pan free from the tube. I found it best to hold the pan planar (yes, planar) to the gasket mating surface, and then to jostle, jiggle, pull, and generally curse it free. Yes, it will eventually come free, and this happens just a little before you decide to give up and have the car towed to the nearest mechanic.
Be calm.
Now, with the pan completely free from the tube and the block, you carefully jigsaw-puzzle it down and to the driver's side. Be careful not to foul any of the wires and components that the pan was covering. This too will seem impossible. But, the pan can be jigsaw-puzzled through without warping nor damage to anything else.
Hey, Jeep folks...how about putting the exhaust just 1/2" forward! Just 1/2"! That'd be nice. Or, how about putting the crossbar support 1/2" further to the rear?!? 1/2"!!! How about maybe doing both? It should be requisite that the folks who design this stuff also have to service it...Yeesh.
Cleaning, cleaning, and cleaning
Now, clean the pan with the carbeurator cleaner. It evaporates fast, and so leaves a clean finish. You can use the degreaser on the outside, but use the carb cleaner on the inside and gasket surface. I also use a razor to shave and scrape the gasket surface. If you hold the angle well, it won't gauge the surface, and it cleans the old crap off real well. I also take out the drain plug and clean the threads on the plug and the pan. Afterwards, lube the plug with a little tranny fluid and hand-tighten it back in place. Be sure to clean the filler tube (inside too) and joining area, so that it will assemble with less hassle.
Also, clean the transmission block gasket surface. Be sure to wipe off any garbage you see. Be careful not to damage any sensors or connectors. You can clean the chassis near to the gasket and pan area so that no garbage falls in to the gasket when you have to jigsaw-puzzle it back in place later on. I just used the cardboard from the gasket kit to shield the tranny area while I sprayed the chassis; then just wiped the sprayed area after 5 minutes. If it's real nasty, use a stiff nylon brush to scuff the surface before and after spraying. That will really loosen the gunk. To save time, I wrapped the exhaust pipe with a plastic shopping bag to keep it from dropping gunk as I replaced the pan. I have done a lot of off roading, with a lot of river crossings, and my exhaust pipe shows it.
Reach up and clean the end of the filler tube with a rag soaked with a little carb cleaner. This way the tube will be ready to accept the pan end when reassembly occurs.
Replacing the transmission filter
Now, take off the old filter. This is the easiest part. I had 4 bolts. Remember the orientation, so you can put
the new one in the same way. Wipe the mating surfaces and bolt mounts clean. Get the new filter and dab some
fresh tranny fluid on with your finger, and lubricate all of the cork and gasket surfaces as well as the bolt mount areas.
This is a good general rule -- you don't want to mate bare surfaces, so lubricate them with the fluid or grease of their
given environ. Make sure the 4 bolts are clean, and then dip them in tranny fluid before affixing the new filter.
Set the new filter in place and get all 4 bolts in finger tight before finally tightening them all.
You should tighten them to the recommended torque. Again, I use The Force. You should probably consult a manual.
Reinstalling the transmission drain pan with a new gasket
Now, take your clean pan, with it's hand-tightened drain-plug, and lubricate the flange, or gasket mating surface. Set the gasket on it. Make sure the holes line up. The holes are conveniently non-symmetric, so you'd really have to be a moron to screw this up. It only goes one way. make sure you can see slearly through every hole, through the flange. Now, as a convenience, I push the now clean-and-tranny-fluid-lubricated pan screws into position, using the tight gasket holes to hold then in place. DON'T use any sealant or adhesive. If the kit and manufacturer say the gasket is good enough, don't go and ruin things by caking a bunch of sealant crap all over the gasket. The last guy who worked on my car did this, and afterwards there was a bunch of sealant running amok inside the tranny pan, and eventually the tranny. Bad joss!
Be calm.
Finally, finger lubricate the exposed gasket surface with yet more tranny fluid. Seeing a pattern here with the lubrication? Be sure to lubricate the inside of the filler tube joint. Orient the pan correctly under the car, and make sure you have forward forward, backward backward, and up up. Wet your fingers with some tranny fluid and reach up and lubricate the male end of the dipstick filler tube. Now, jigsaw-puzzle the pan back into position. Don't worry if some pan screws fall out. You covered the area, right? So they'll just fall onto your well covered, clean area, right? The real bear will be to get the dipstick tube ends to line up at the connection joint. Again, it seems beneficial to orient the pan in final position planar to the mounting surface, and then to hand set the tube connection. Finally, push the entire pan, in a planar fashion, upward. Once the filler tube mates, you will notice the pan become flush to the block.
Be calm.
Now, reset the pan screws. Put them all in a little loose (like half way), until they are all in -- this allows for play in the lining up of holes. Be calm and make sure that you set the screws properly so that you don't go and strip any threads. Breathe, relax, take it easy. I usually set them by holding the socket wrench extension in my hand, while humming a little Creedence Clearwater Revival, and hold off on the actual socket wrench until after everything is well seated. Your mileage may vary. Make sure the gasket is indeed seating properly, and that that screws are indeed engaging their respective gasket holes before entering the block. Again, you should fasten the screws in that crosswise, clockwise fashion that you researched earlier. Right? Set them all snug. Then after they are all snug, set them to the final torque specification.
Finally, when all done with the pan, be sure to now tighten the drain plug to the right spec.
Remain calm.
Now, look around. Forget anything? Are your car keys in the pan that you just fastened to the the tranny? Any extra bolts lying about? See any terrorists? You can never be too careful about terrorism.
Refilling with new transmission fluid
Now, with the hood all the way up, set the transmission filler-tube funnel in place, and put in 4 quarts. DONT put in 5 quarts. Put in ONLY 4 quarts. The specs call for 4. Then you place the dipstick back in place, and close the hood.
I found that it helped to securely wrap, and hold, a rag around the filler tube right at the funnel-tube junction. This helps to keep any new fluid from running down the dipstick tube while refilling with new fluid.
Putting your newly serviced transmission through the motions
Clean up the entire area. You are done with that phase. Now, with your car on a level surface, start the car and let
the engine idle for 5 minutes. Then press on the brake and slowly shift through all of the gear settings from Park through
all settings and back to Park, letting each setting engage before moving on. Make sure the vehicle is on a nice, flat surface; and with the car in Park and the
brake set, check the tranny fluid. Wait 10 minutes and check again. If you need to add any. be sure to NOT overfill.
Add a little at a time, and DON'T overfill. For the next few days keep an eye out for leaks, and afterwards
be sure to check the fluid level regularly, as you usually do, right?
Since you just serviced the pan and filter, and really let the tranny drain, it will take some time for the fluid to resettle back to the drain pan. So, don't freak out if it first seems low. Just put in those original 4 quarts like we went over above, and run the car through it motions, letting it run in a warm idle; and then go and grab a beer (with the car turned off by beer grabbing time).
At first I thought 4 quarts might not be enough, but by the next morning, the dipstick showed a healthy reading.
All done
You know the rule: Good prep == no cleanup.
Therefore, you don't have to deal with cleaning up any slopped around messes. However, you might want to clean your tools, and now is a good time. Wipe them down with a rag shot with some carb cleaner. Wipe out the cat-litter type box. But, don't wipe that grin off your face. You earned it. Nice job.
The Small Print (Legalese)
I make no claims with the information offered herein. This article is intended for humorous purposes only. Yeah, sure, I did service my transmission using the information given; but then, what do I know -- I'm not a mechanic. In fact, I am a moron. I do not *get* it. I do not get *it*. Never did. I just wanted to spoof Slackerdom.com. Do your own homework, do your own research, use your own brain, pick your own nose. Seriously, you could get really hurt trying to service your own vehicle. Like, dead-hurt. You could even get hurt ordering a coffee from drive-through at McDonald's. Think about it. Coffee. I know. Just stay inside and click your mouse -- we'll both be better off.
